How to Split a Photo into an Instagram Carousel
Turn one wide photo into three swipeable carousel slides. See the crop, check source dimensions, download in order and troubleshoot broken seams.
A split carousel lets someone swipe across one wide picture. The files are separate, but the right edge of one continues into the left edge of the next. The part that needs care is choosing the crop before cutting, then keeping that crop when you upload.
To split a photo into an Instagram carousel: open the panorama maker, choose your image, check the crop and download the three slides. Add them to one Instagram post, selecting slide 1, then 2, then 3. Preview every slide before sharing.
This guide uses our tool’s current preset: three 4:5 slides, up to 1080 × 1350 pixels each. It does not offer a slide-count or aspect-ratio selector. The examples below are an illustrated landscape and actual local exports, with a swipe diagram to explain the result; they are not screenshots of a published Instagram post.
First, choose a carousel or a profile grid
A carousel contains several images inside one post. A profile grid spreads separate posts across your profile. Putting three panorama slices into three separate posts will not create the swipe effect.
| What you want | Use | Upload order |
|---|---|---|
| Swipe across one photo inside a single post | Panorama maker | Left → middle → right |
| Spread a photo across nine separate profile posts | 3×3 grid maker | Follow the numbered grid files; the default newest-first layout reverses visual order |
For the second task, use the nine-tile photo-splitting guide. The steps below are for a carousel.
Step 1: work out which part of the photo survives
Three 4:5 slides form a 12:5 strip, or 2.4:1: 3 × 1080 pixels wide by 1350 pixels high. With Centre crop (recommended), the tool takes the largest centred rectangle with that proportion.
- A source narrower than 2.4:1 loses some of its top and bottom.
- A source wider than 2.4:1 loses some of its left and right edges.
- A source already at 2.4:1 keeps the whole frame.
Here is a concrete example. A 3240 × 2160 landscape has a 3:2 ratio. The tool keeps the middle 3240 × 1350, removing 405 pixels from the top and 405 from the bottom. Each third then becomes a 1080 × 1350 slide.
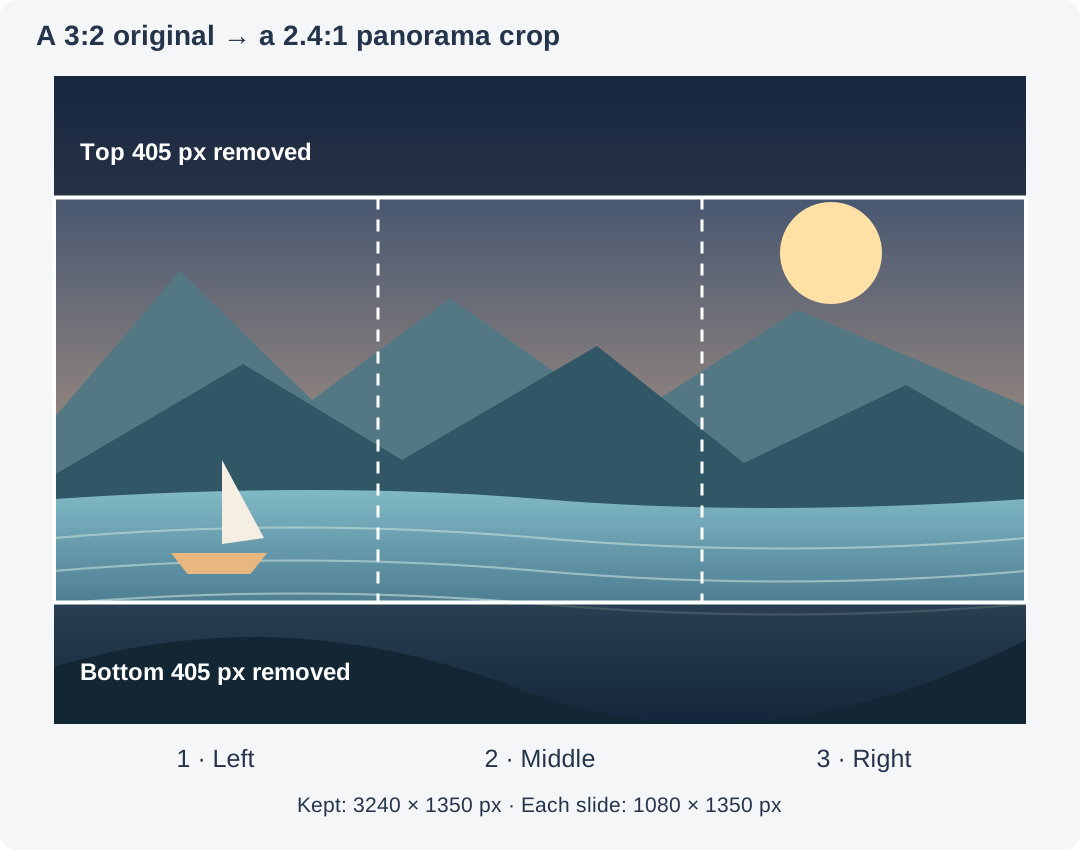
Download the original sample to try the same crop yourself. Keep faces, text and important landmarks inside the retained strip, and away from the two vertical cut lines.

If the automatic crop puts the subject in the wrong place, crop the original yourself to 12:5 in a photo editor, then load that version. The tool has no drag-to-reposition control. Stretch to fit keeps the whole frame by changing its proportions; it does not add padding and can distort people or buildings. For an undistorted result with the full frame, prepare a 12:5 canvas with background padding in an editor before splitting.
Step 2: check the source resolution
At full export size, three slides need a retained region of 3240 × 1350 pixels. Both width and height matter. A very wide but short image can still export below full size.
| Original dimensions | Centre-cropped region | Each exported slide |
|---|---|---|
| 3240 × 2160 | 3240 × 1350 | 1080 × 1350 |
| 2400 × 1600 | 2400 × 1000 | 800 × 1000 |
| 4000 × 1000 | 2400 × 1000 | 800 × 1000 |
Our tool keeps smaller sources at smaller output dimensions rather than enlarging them to 1080 pixels wide. Check the size warning above the download button. Choose the original camera file over a screenshot or a compressed copy if you need more detail. For other post formats, see Instagram image sizes; the dimensions here describe this tool’s preset, not a maximum for every Instagram format.
Step 3: split and download the slides
- Open the free panorama maker in your desktop or phone browser.
- Choose a JPG, PNG or WebP image up to 20 MB.
- Keep Centre crop (recommended) and inspect all three slides. If a face or word is cut, prepare a different crop before continuing.
- Turn on Seamless preview to inspect the image with the preview gaps and labels hidden. This changes the preview, not the files.
- Choose PNG or JPG, then download the individual slides or Download all 3 slides (ZIP).
For the sample above, the actual PNG downloads are:
- instagram-panorama-slide-1-of-3.png — left, selected first.
- instagram-panorama-slide-2-of-3.png — middle, selected second.
- instagram-panorama-slide-3-of-3.png — right, selected third.
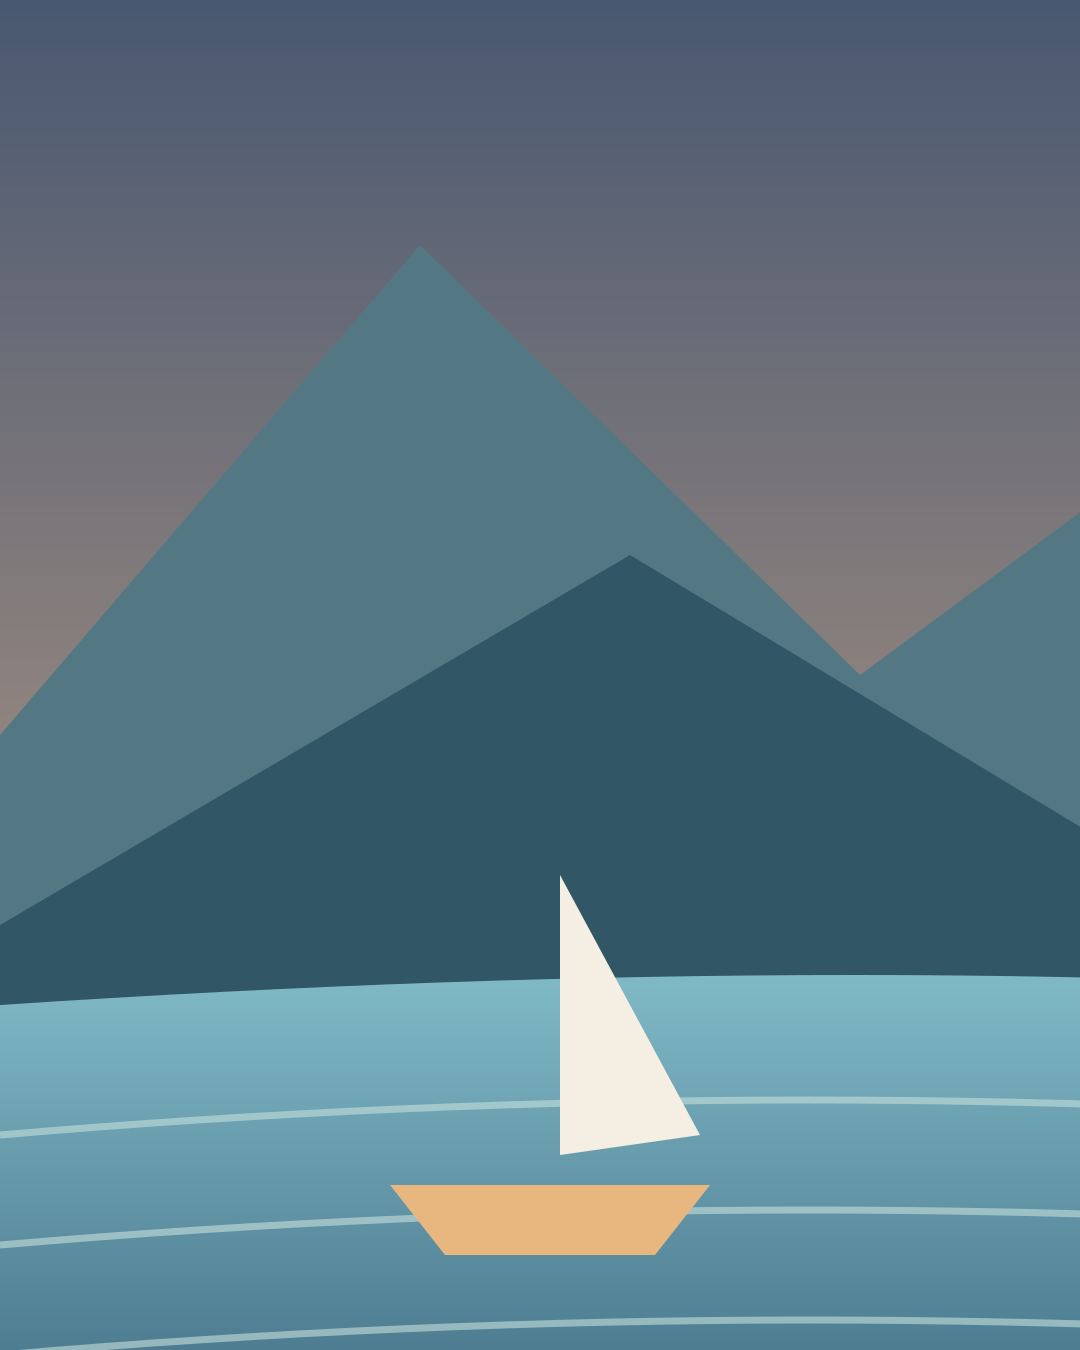


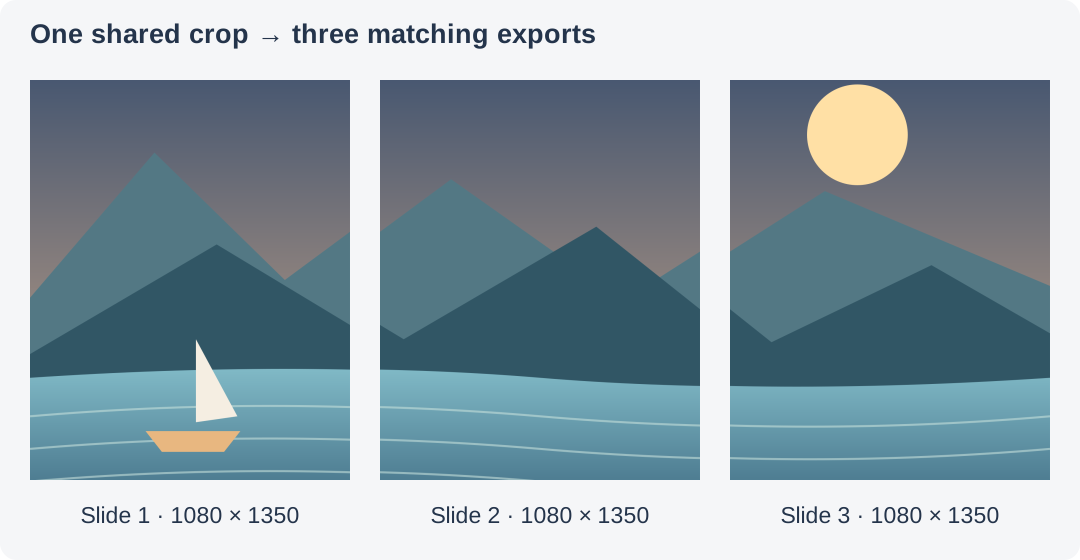
On an iPhone, find the ZIP in Files and tap it to extract the folder, as described in Apple’s ZIP guide. Save the extracted images to Photos if Instagram’s picker does not show them. On Android, extract the ZIP in your file manager and check that the slides appear in your gallery. The save controls vary by phone and browser; downloading a ZIP alone does not put its images in your photo library.
Step 4: upload as one carousel, left to right
- In Instagram, start a new Post and choose the multiple-image selection control.
- Tap slide 1, slide 2, then slide 3. Check the selection numbers or thumbnail strip; filenames are a reference, not a guarantee that the picker sorts them correctly.
- Inspect each image in the editor. Keep the full exported frame visible and the framing consistent across all three. If the editor crops the slides again, correct that before posting. The exact controls can vary with app version and account.
- Keep edits consistent. A filter, brightness change or border applied to only one slide can make the boundary obvious.
- Add your caption and inspect the sequence before sharing. After publishing, open the post and swipe through the slides to check the result on your account.
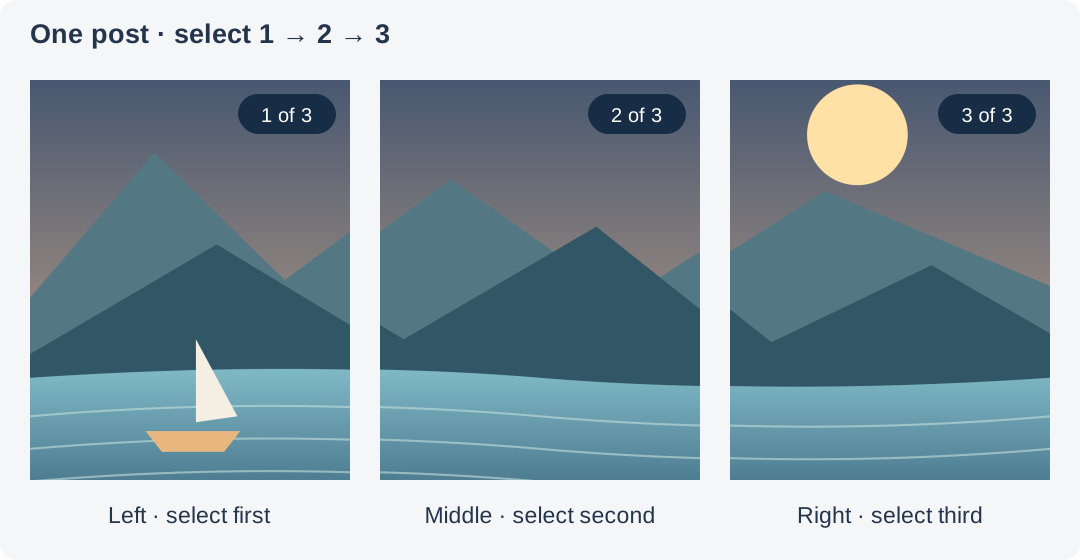
Do not reverse these files. The reverse-posting rule belongs to separate profile-grid posts, not slides selected for a carousel. Your browser’s seamless preview checks the exported composition; it does not simulate Instagram’s swipe animation, compression or profile thumbnail.
If the panorama looks broken
Start by comparing the downloaded files outside Instagram. If they align there, focus on upload order, framing and edits. If they do not, go back to the source and the split.
| Symptom | Check | What to try |
|---|---|---|
| The scene jumps backwards | Selection order | Select left, middle, right and inspect the sequence |
| A horizon jumps vertically | Different framing or rotation between slides | Keep the full exported frame visible; remove individual crop changes |
| A white line interrupts the scene | Borders on each exported slide | Apply a border to the assembled strip before cutting, or remove inner borders |
| Colours change at a boundary | Different filters or exposure adjustments | Use matching edits, ideally applied to the original before splitting |
| Slides are soft before upload | Export dimensions and original file | Use a higher-resolution original; cutting cannot restore missing detail |
| Slides align locally but look different after upload | Instagram framing and processing | Recheck the full post, crop controls and consistent edits; compare on your account |
If a gap appears only while a finger is moving between slides, compare the settled images too. Space introduced by the app’s transition is different from missing content inside an exported file. Do not add overlapping strips solely to compensate for a momentary transition gap.
For softness or colour changes beyond the seams, see the Instagram image-quality guide.
Questions before you post
Can I split into two, four or more slides?
This panorama tool currently makes three. In an editor, a 4:5 layout with N slides needs a canvas N × 1080 pixels wide by 1350 high, then equal-width slices. A two-slide canvas is 2160 × 1350; a four-slide canvas is 4320 × 1350. Those are layout calculations, not additional settings in this tool.
Can I keep the whole photo without stretching?
Yes, if the source already matches 12:5, or you place it on a 12:5 canvas with padding first. Centre crop removes edges; Stretch to fit changes proportions. Neither mode adds a background around your image.
Will the whole panorama appear across my profile?
The carousel is one post, so it occupies one profile slot rather than three adjacent slots. Check its thumbnail separately from the full carousel. If you want a picture assembled from several profile posts, use the grid maker and review profile-grid cropping.
What should I check before sharing?
Confirm that the crop keeps your subject, every slide has matching dimensions, the images are selected 1 → 2 → 3, and no individual edit breaks the continuity. Inspect the full frames in Instagram before sharing, then check the published post on your account.